Ask the Builder: Avoiding DIY stair handrail woes
Several weeks ago, I shared a story with you about a young woman. She attends our church, and my wife and I are friends with her. A week ago she reached out to me with a new problem. She was attempting to install a new handrail on two flights of stairs in her condominium.
This woman had the best of intentions. She got her younger sister to jump in and help. Within an hour or two, they ran into significant difficulties. I can imagine this happening to you.
The problem started when she bought the handrail. She went to a large online retailer and purchased a prefabricated handrail made from black iron pipe. I’m convinced she felt that the manufacturer would sell a product that would work. That’s a very long bridge to cross, in my opinion.
Staircases create significant safety risks. A white paper published by the National Library of Medicine states that, on average, 1,076,558 people are treated in emergency rooms each year in the USA. That equates to just under 3,000 people a day or about 125 injuries per hour.
This high rate of injury is addressed in the building code. The causes of injuries can be the design of stairs, handrails and the like. Code officials for years have developed very good guidelines and requirements for stairs, landings and handrails.
The issue is that you may not be focused on these. You’ve used handrails your entire life and haven't thought much about how they should be designed and built. More importantly, you might not have considered how a handrail should be installed so it doesn’t pull out of the wall, causing you to tumble down the stairs.
The building code stipulates the length of the handrail must match the length of the stairs. This makes sense, as you want to be able to grasp it at the top step as well as right before your footsteps off the last step on the floor below.
My friend purchased a handrail that wasn’t long enough. What’s more, the handrail came with circular flange plates that are screwed to the wall.
The emergency help text she sent me had photos of the pre-drilled holes in the circular flanges. She thought she was doing the right thing by screwing these flanges onto the short stubs of iron pipe as tight as possible. This caused some of the holes to be blocked by the handrail. It was impossible to drive the screws.
I told her: “You have to unscrew the flanges so all the holes are not blocked by the railing. The flange doesn’t need to be screwed tight to the pipe nipples. Once the handrail is up, the flanges can’t unscrew.”
The design of the handrail was inferior, in my opinion. The pre-cut pieces of pipe placed these round flanges at distinct points along the railing. The odds of the flanges being centered on a wall stud were very low.
The manufacturer sent along simple plastic anchors to put into the drywall. The railing is now a disaster waiting to happen. The woman told me that after she adjusted the flanges and installed the screws, the railing was loose and wobbly.
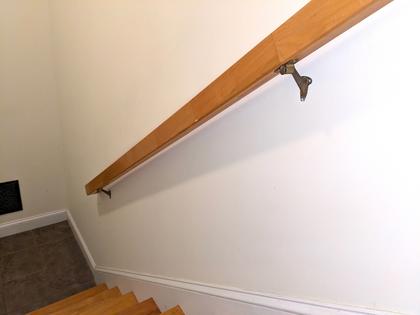
The building code stipulates that stair handrails must be parallel with the line created by the front nosing of the steps. The vertical distance from the front tip of a stair nosing to the top of the railing in a plumb line should be between 34 and 38 inches. I’ve found from years of practical experience that 35 inches is very comfortable.
You can easily create this parallel line on a wall by creating a rectangle using stiff cardboard. Make the cardboard four feet long by 28 inches wide. Be sure it’s a perfect rectangle. Place the four-foot edge on the steps so this long edge is touching three or four stair nosings. The top of the cardboard will create the line for the top of the handrail. Slide the cardboard up or down the steps making marks with a pencil to create the line.
The next challenge is to locate the center of the wall studs. There are many stud-finder tools you can use to do this. I then like to attach the metal brackets to the handrail. If you’re using a simple wood handrail, I’ve found spacing the brackets 6 feet on center gives lots of support. Attempt to get a bracket as close to the top and bottom of the handrail as possible.
The screws should penetrate into solid wood at least 1.5 inches. Drill pilot holes to make the installation easier. The pilot holes' diameter should be about 40% of the outer diameter of the screw threads. The pilot hole depth only needs to be 70 percent of the depth the screw will penetrate into the wood.
Subscribe to Tim’s FREE newsletter at AsktheBuilder.com. Tim offers phone coaching calls if you get stuck during a DIY job. Go here: go.askthebuilder.com/coaching
©2024 Tim Carter. Distributed by Tribune Content Agency, LLC.


Comments